10 DJI Focus Pro Tips You Should Know
DJI Focus Pro , LiDar & Transmission Tips
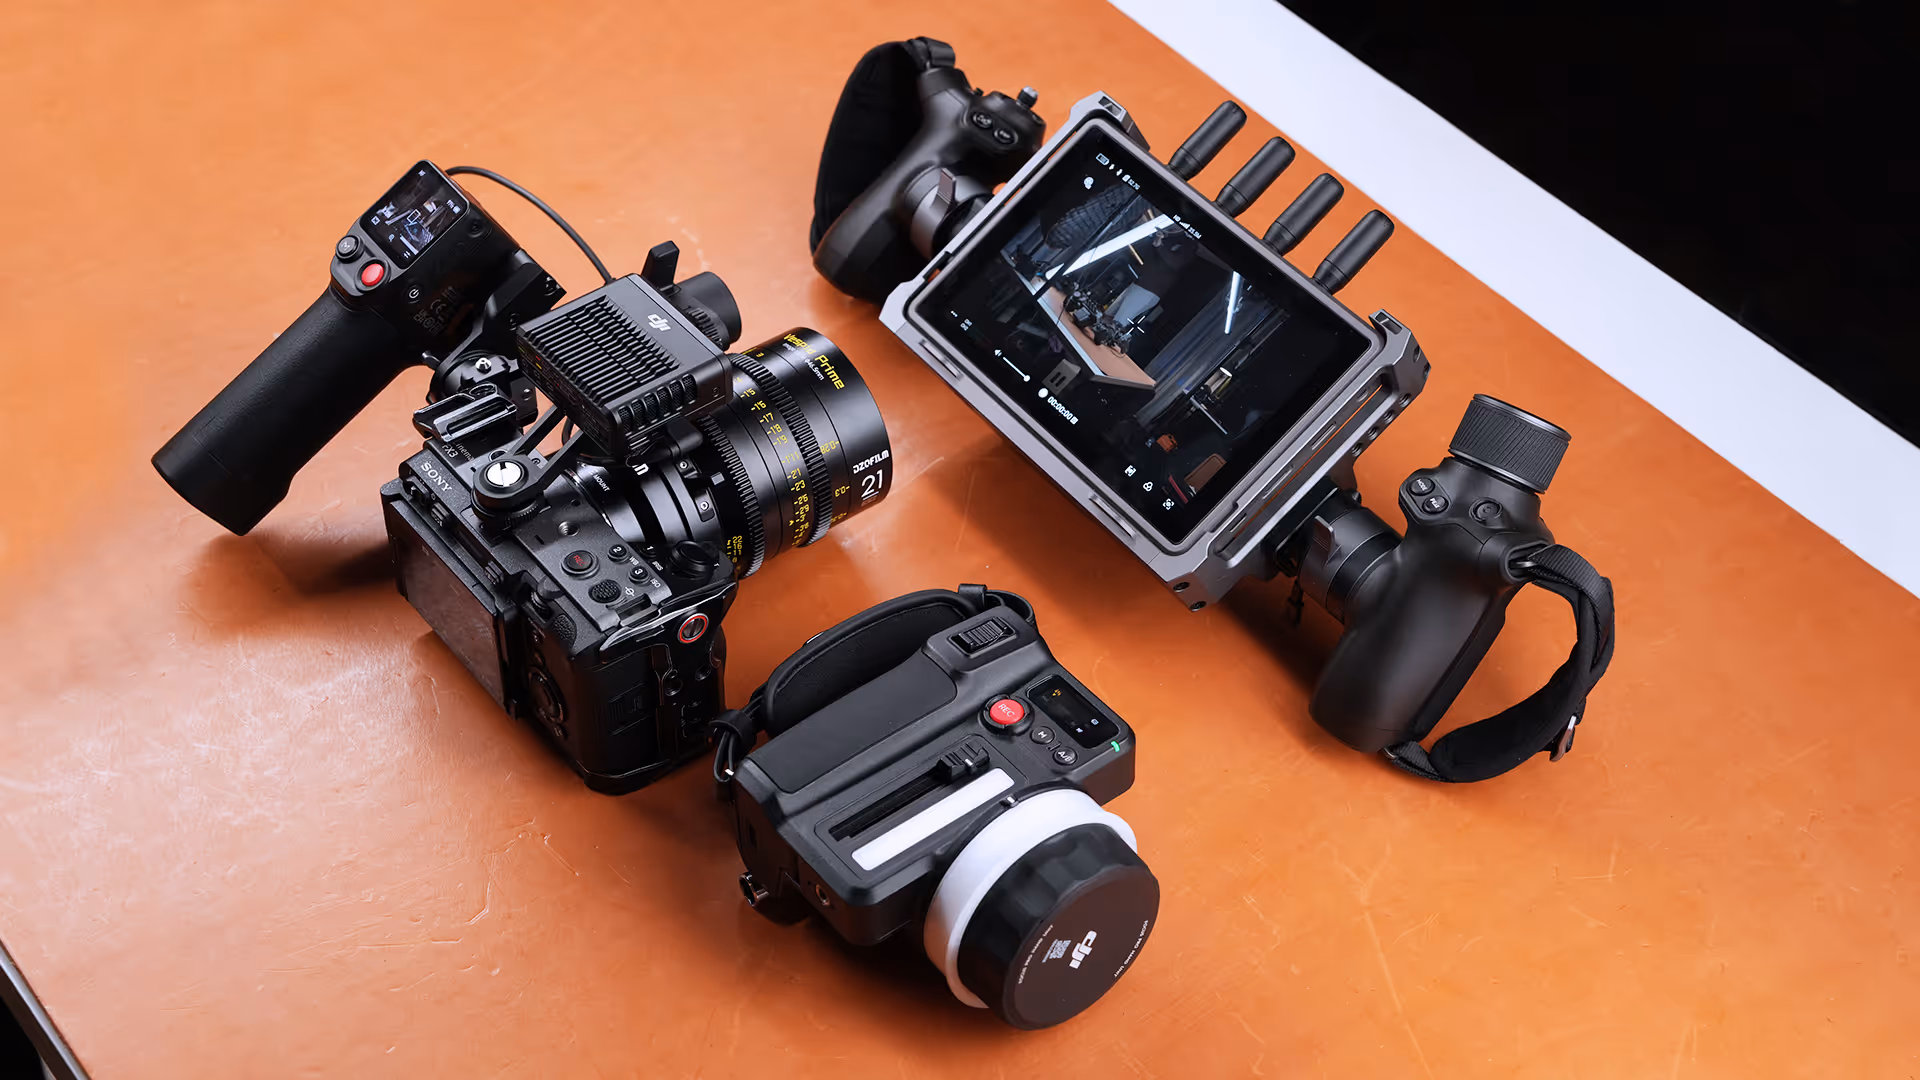
While making a video about the RS4 Pro Gimbal, I realized the DJI Lidar, transmission and follow focus deserved it’s own video. Here are a 10 things that took me a lot of testing and shooting to learn about the focus pro LiDAR, transmission and follow focus.
1. Use this Setup with a Gimbal, or Hand Held
My first tip for the DJI Focus System, is that you can use this system with or without the Ronin gimbal. Depending on how you want to adjust focus, or what features you need, you’ll need to build your camera out differently.
For example, if you want to use just the Focus Motor and the DJI Hand Unit, as long as you can power the focus motor with USBC, you only need those two things to work. Or if you want to use all of the DJI Focus Pro system together, you can also do that, which brings me to my next tip…
2. Get The Transmission Cable Hub
If you’re going to use the gimbal, lidar, transmission and focus pro, it’s best to use the cable hub instead of connecting everything via USBC to the gimbal. If you’re using this handheld, using this hub is your only option to get all of these devices to work together.
Using the cable hub, you’ll get much more functionality from the monitor, like being able to see the LiDar Waveform on the DJI monitor. See the Focus distance meter on the monitor. Control the gimbal remotely with the handles - or master wheels if you’re a baller, and be able to start focus motor calibrations from the monitor.
To use this setup handheld, you’ll have to use the version 2 of the DJI Transmission hub. I don’t know exactly what to call this, since this hub isn’t available on the DJI site yet. This version is compatible with the new focus motors, new LiDAR Pro and has a power cable that you can swap out based on what setup you’re using. You can either power this with the dual USB-C to the front of the RS4 Pro, or using the D-TAP if using handheld.
I reached out the DJI and they said this version of the cable hub will be available sometime in July.
3. Get the Proper Accessories
My third tip for the DJI Focus Pro system is to make sure you have all of the accessories you need to get up and running. There are a lot of different ways to use this setup, so however you want to use this will determine what you need to use.
This setup can work without accessories, but your life will be easier with the right accessories
If you already have your setup, you can skip this one, but if you’re in the beginning stages of piecing everything together, check out my accessories video where I go over what I use and why. I’ll leave it linked on screen at the end of this video.
4. Focusing with DJI Handles vs DJI Focus Pro Hand Unit
Fourth tip for the DJI focus Pro system has to do with remote focusing. There are currently two ways to have someone else focus your camera while youre using the Focus Pro motors. The first one is with the Focus Pro Hand Unit, the other is with the DJI handles attached to the high-bright monitor. I wrote down some notes about how I use each of them, and when one makes more sense than the other.
Focus Pro Wheel
First up, the Focus Pro Wheel and this is works great with a team.
- The 1st AC can adjust focus, iris and zoom
- Can set a/b points, and you can pull past the a/b points if needed. They are hard stops, but if someone moves past their mark, you can force the wheel to move past the a/b points if you need to.
- Can adjust tension of the wheel
- Can use this with or without the DJI High-bright monitor. You can use another wireless video system or the regular DJI receiver attached to another monitor.
- You can attach the hand unit to the high-bright monitor using the bracket.
- Have to pair it with the DJI Focus Pro Motors, can start a focus motor calibration remotely
- Can’t adjust the gimbal position, but on a team, let the camera operator handle that.
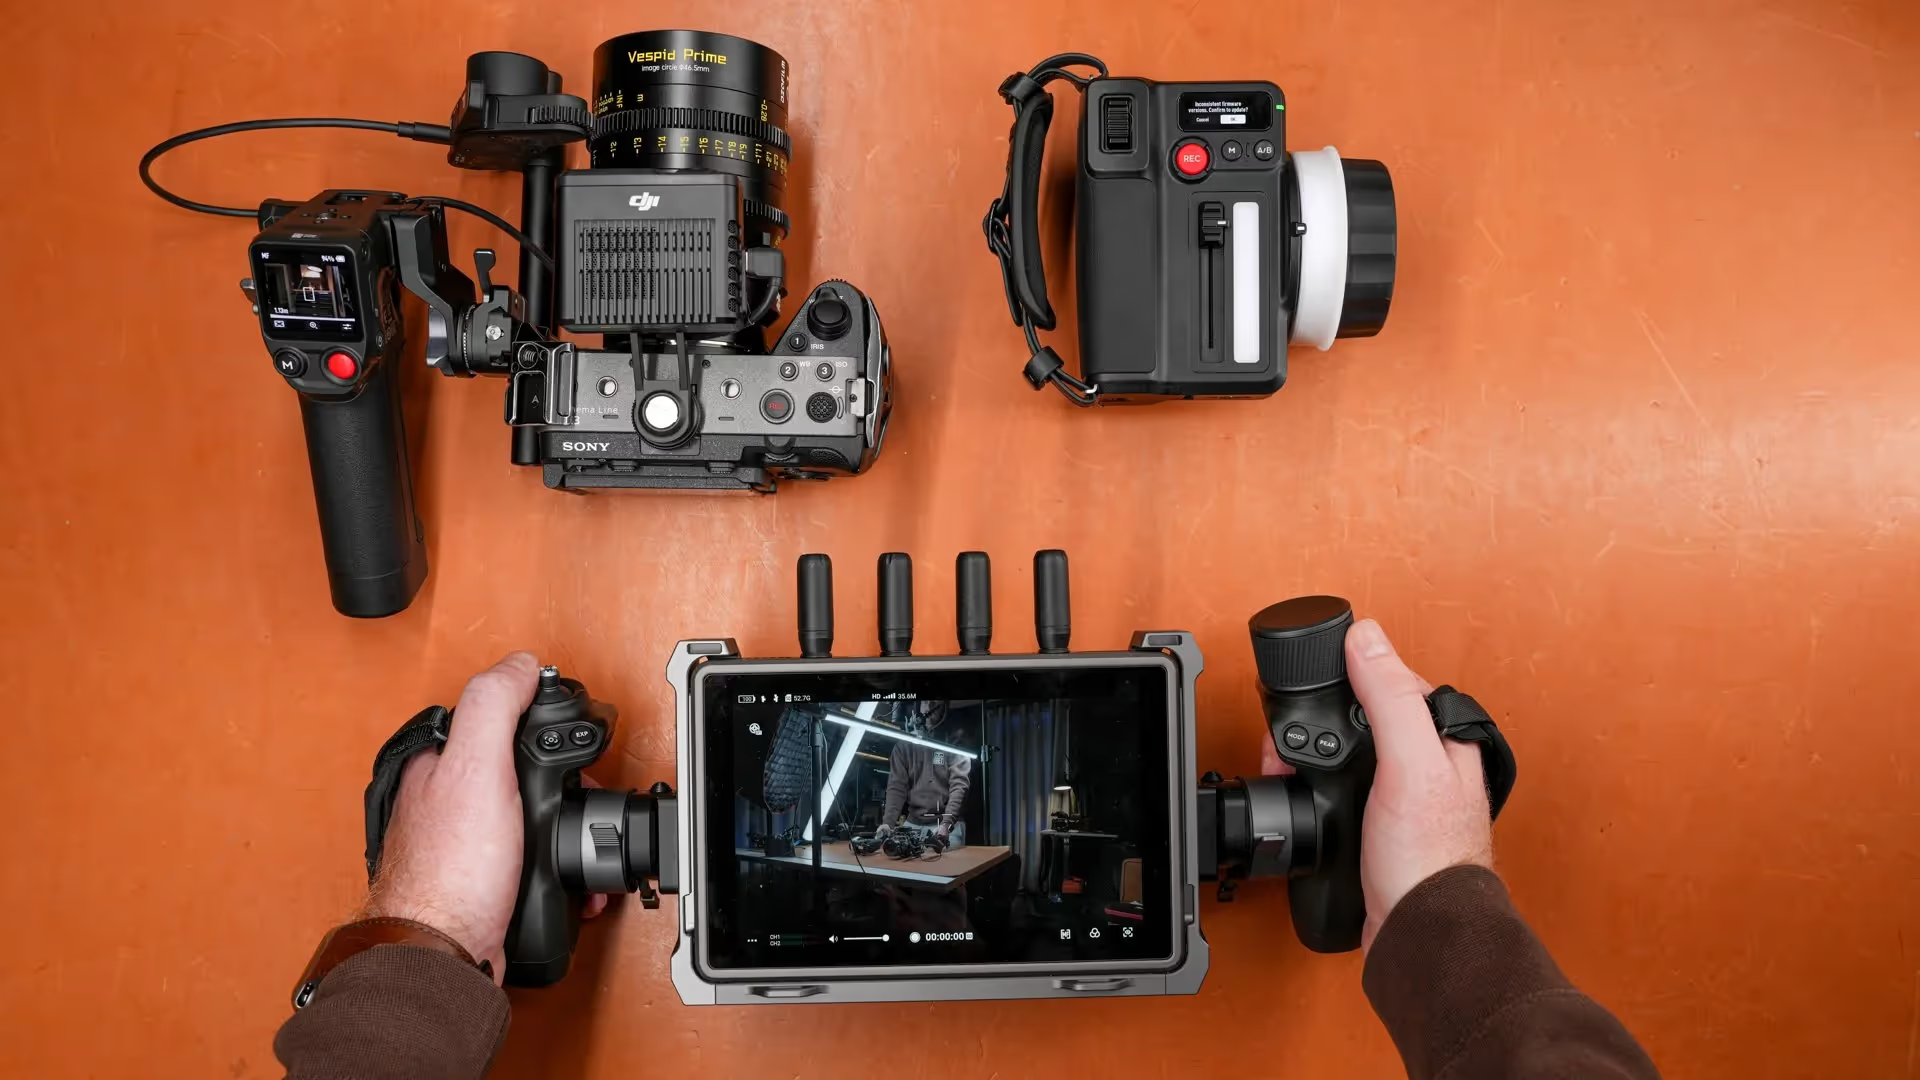
DJI Handles
Now onto the DJI Handles, these seem better for small teams or remote operating yourself.
- One of the biggest benefits for the handles: Can adjust gimbal positioning and focus, but there are no A/B points when adjusting focus like on the hand unit.
- Long focus pulls are pretty difficult, smaller focus adjustments are fine though
- No focus, iris or zoom control at the same time. You can customize what the right handle wheel does, but it only has one function at a time.
- Easy to use with the DJI Monitor, but can only use them with the DJI Monitor
- This is more about the monitor, but the handles make it much easier, since you have another way to hold the monitor to make it more precise. You can activate the gyroscope to have the gimbal follow how you move the handles and monitor.
- Great for car mounts or where the gimbal and camera will be in a remote location. Makes adjusting the gimbal position and focus very easy. Much easier and more reliable than using the RavenEye.
5. The DJI Focus Pro Grip if you’re using this Handheld
My next tip, if you’ll be using this setup handheld, and you want to control focus yourself, you’ll need to use the DJI Focus Pro Grip.
Thats the only option you have to use this without the RS4 Pro and adjust focus handheld. On the RS4 Pro, you can adjust the focus motors with the dial on the front. But handheld, this is currently your only option to adjust focus on camera.
It’s pretty easy to use, if you know how to use the RS4 Pro, then you’ll know how to use the Grip. If you don’t know how to use it, check out my RS4 Pro tips and shortcuts video. Most of those shortcuts also apply to the grip.
6. Pick the correct Lidar autofocus modes
This next one caused me a lot of confusion, trial and error to figure out. For some reason, this was the most difficult part of working with the LiDAR for me. It’s to make sure to choose the correct LiDAR Autofocus mode. If your autofocus isn’t working as expected, you’re probably in the wrong mode.
To add some context here, there are two lidar autofocus modes, wide and flex spot.
Wide focuses around the center of the frame, until a person enters the frame, and face detect autofocus takes over. If there are multiple people in the frame, the person closest to the center takes priority, but you can switch between subjects with the front dial on the gimbal or Grip.
Flex spot follows the subject that you select on the back of the camera, but in my testing this mode struggles at anything else. It’s great for tracking, but jumps around a lot if your using this mode without a tracking target.
To use active track, you have to be in wide mode, and pressing the front trigger once to initiate active track. LiDAR Autofocus works with the gimbal or handheld, while active track obviously only works with the gimbal.
After using this for a while, I’ve found that leaving the LiDAR autofocus mode to Wide for the most part, gives me the best results. Using wide for the subject tracking and active track, and I only switch to Flex spot when I have a specific person or thing that I want to track. It sounds easy, but when you’re out using the LiDAR autofocus, it’s easy to overlook this setting and it caused me to miss a lot of shots at first.
7. Playback on the monitor instead of the camera
The next tip has to do with the DJI monitor, that is to configure your camera to trigger the recording on the DJI monitor. You’ll need to have a micro SD card in the monitor, but this is great because after setting this up, the monitor will start and stop recording automatically when the camera starts rolling. There are tally lights on the monitor so you know the camera is rolling as well.
I love this because playing back on the monitor is much faster and more precise than going over to the camera, putting it in playback mode, waiting for it to switch over, and using the controls on the camera to start and stop the playback. The monitor is faster and easier to use, but it can’t do everything.
With the DJI monitor, you can preview the clip quickly, if you sent a log image to the monitor, you can apply different LUTs on the main page and they will get applied to the playback, so you can get an idea of how different LUTs could look.
It can’t play back slow motion, I’d love if DJI would add that in a future firmware update. This monitor capable of capturing different frame rates from the camera, but is unable to show them in slow motion. Having multiple playback speed options would be fantastic. Would also love if the monitor let me slowly scrub through the captured footage with the wheel on the right handle.
Really quick, to set up the HDMI recording control on the FX3, go to menu, external output, HDMI Output settings, REC Control, On
On the FX6, go to the main menu, Project, SDI/HDMI Rec Control, Setting, You can set this to either option, I set mine to Parallel.
Now whenever you start recording, and you have a micro SD card in the DJI Monitor, recording on the camera will trigger the recording on the DJI monitor. Love this feature.
7b. Set the fan to silent on the monitor, the fan is very loud.
8. DJI Focus Pro LiDAR, AMF vs MF
My next tip is for the LiDAR, and it’s to know when to use Auto focus, and when to use manual focus
- Diopters or anything that changes focus point, use manual focus
- Challenging backlight situations, manual focus
- The LiDAR struggles in very bright situations, where the light is coming from in front of the camera. Off axis lighting is fine, but when the light is shining directly onto the lidar lens, it struggles to stay locked on while the subject is moving.
- LiDAR is actually better in low light
If you’re using wide mode Auto-Manual Focus, and the autofocus is jumping around all over the place, take a look at what exactly the LiDAR sees vs what your camera sees. If your autofocus is jumping around and you want to focus in the center on your subject, that means there is a big difference in the field of view.
In theory, as long as the lidar keeps the proper distance of the subject, the depth of field will be correct. But if the focus keeps jumping around, that means the LiDAR is struggling to maintain tracking on the subject. I mostly keep mine at 3 and only adjust it if I really have to.
9. Configure your lidar positioning correctly on the DJI Monitor or on the back of the Gimbal
If your LiDAR rangefinder distance markers or autofocus seems off, make sure the LiDAR distance is properly set in your app, DJI Monitor or gimbal. The LiDAR distance should be set in your settings from the sensor of your camera to the front of the LiDAR Rangefinder
Take the time to measure your lidar distance from your sensor for the best results, especially if you like to shoot wide open with a very shallow depth of field.
This sounds pretty obvious, but if you move your LiDAR between your gimbal and handheld, the LiDAR distance could be off and give you poor autofocus results.
10. Daisy Chain Your Focus Pro Motors Together
Another nice feature of the new DJI Focus Pro Motors, is that you can daisy chain your motors together, so if you have Focus, Iris and Zoom, you can daisy chain all of those motors together, then only need to use one USB-C Cable to your gimbal, hub or grip to use all three wires.
11a. Active Track: LiDar vs RavenEye
I originally had a bonus tip here, and that was to compare the LiDAR active track to the RavenEye active track, and tell you the differences between the two, but I accidentally fried my RavenEye, so I can’t do the test yet. You’ll have to check back for that test. I’ll do that comparison when my new RavenEye comes in.
11b. Safely Charge Your Batteries
And for the record, me burning out my RavenEye was totally my fault, my RavenEye battery was dead and I was impatient - so I used one of my huge USB-C fast chargers to quickly charge my RavenEye and I ended up leaving it on the charger too long and frying the battery. The battery actually swelled up, I knew that might happen but I did it anyways and now I’m paying the price of needing to buy another RavenEye. So my bonus tip is now, use the proper chargers for not only the RavenEye, but all of these products.
Using unregulated fast chargers might seem like a good idea, but it’s really not. Use the cables that come in the box and safely charger these devices.
12. Pay attention to lenses you use
My next tip is to be careful of which lenses you’re using if your using LiDAR and focus tracking. For the best results with the LiDAR, make sure your rangefinder has as close to the same view as your cameras lens does. Having an unobstructed view of what your camera sees will help your LiDAR Autofocus judge the distance properly and keep your subject in focus. Getting the rangefinder as close to the front of your lens is going to give you the best results.
If you’ll be using tighter lenses, or your subject moves farther away, going into the 2x of the LiDAR may help you focus better.
You can store up to 3 lenses in the LiDAR, and more in the app, so also pay attention to your LiDAR lens profile when you’re swapping lenses. If your focus is way off, but all of your settings seem correct - make sure you’re using the correct lens profile, or reprogram your current lens.
Check out the lens selection in the app to save yourself some time from manually calibrating if you don’t have to.
Conclusion
So those are my 10 tips for the DJI Focus Pro system, these are things that I wrote down while I was out using them. I have other videos going over the RS4 Pro on my YouTube channel here.